It is quick and easy to make a QuickWeb payment once you know how to do one. Here is a few simple steps for those who have not done it before or are simply hitting a road block on a step.
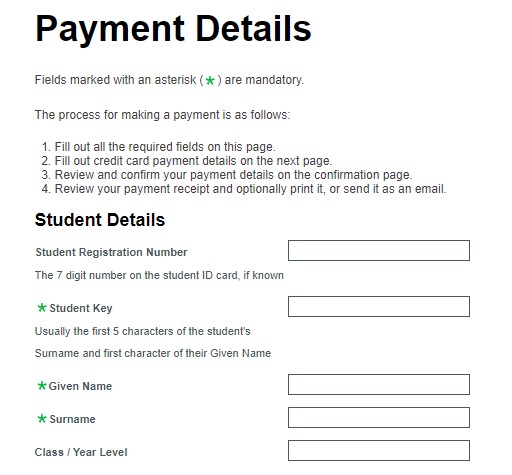
Step 1: Payment Details
When you first open QuickWeb, this will be the first section that comes up on page 1. You only need to fill out the parts with the green Asterix (student key, given name, surname) . If you know the other details without the green Asterix then those details may be put in, if not, don't worry about filling out the sections without the green Asterix.
The student key is the first 5 letters of the students surname and the first letter of the students first name. If the students surname is shorter than 5 letters then put in the whole surname. If you have students with the same surname and same first letter of first name then type in the first 5 letters of the surname and the first 2-3 letters of the first name.
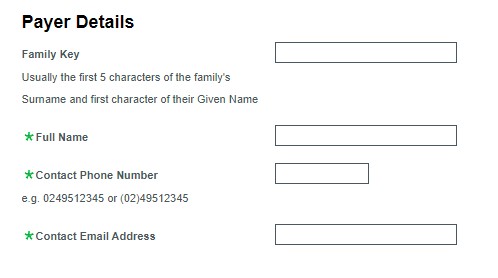
Step 2: Payer Details
This step only the steps with the green Asterix needs to be filled in (full name, contact phone number, contact email address). The family key is the first 5 letters of your surname and the first letter of your first name (the person paying).
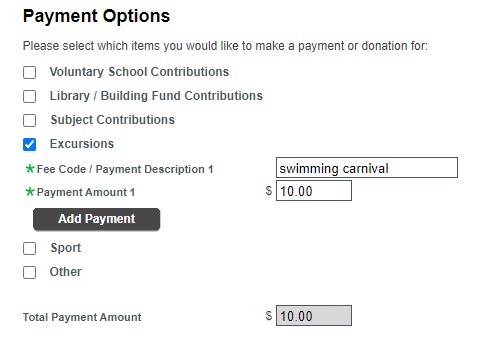
Step 3: Payment Options
This section is regarding what your payment is for. Select an option that describes what the payment is for.
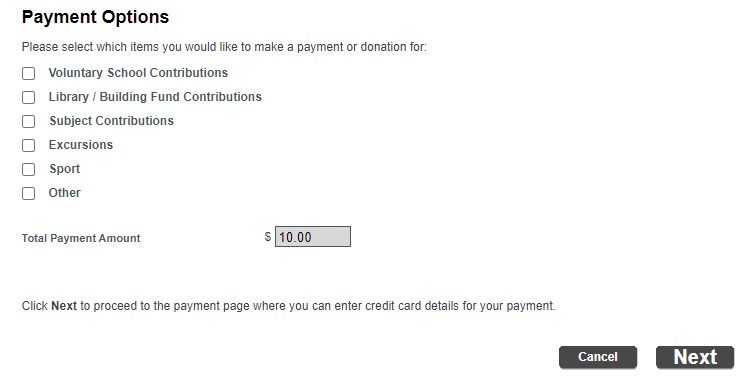
Once you have clicked on an option, it'll come up with boxes off to the right hand side. The first box you will put the name of what you are paying for. For example: Swimming Carnival, Year 6 Shirt, Athletics Carnival, etc. The box under that you will put in the amount you are paying which will also be displayed down the bottom grey box too as shown below.
If you have clicked the Library/Building Fund Contributions, please write in the box next to it that come up, which fund you would like to put the money towards (either Library Fund or Building Fund) otherwise the payment will be slit into both accounts.
DO NOT click add payment unless you are adding in another payment for something else to do with the same child.
Click next down the bottom of the page once finished this step.
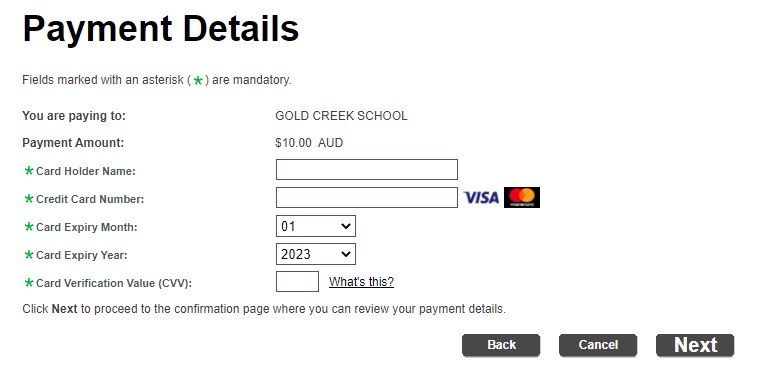
Step 4: Payment Details
This page has the payment details. Enter the details required where there is a green asterix next to it (card holder name, credit card number, card expiry month, card expiry year, CVV).
Click next down the bottom of the page and it will take you to the confirmation page to review all the details you have put in. Once you have reviewed click next and you are finished.